1.1.2. Install on MacOS
1.1.2.1. Install Python 3.9
SimCenter tools require an x86-based Python 3.9 installation. To check if your current Python installation is compatible, follow Steps 1 and 2 below. If it is incompatible, proceed with Steps 3 through 6 below to install a compatible version.
Open a Terminal Window. To do this on your Mac:
1) Press Command (⌘) + Spacebar to open Spotlight Search
2) Type “Terminal” and press Enter in Spotlight Search.
To check if your Python version is compatible, run the following commands in your terminal window:
python3
import platform
platform.uname()
exit()
Ensure the output indicates Python 3.9 and machine=’x86_64’, as shown in the screenshot below. If your python installation does not meet these requirements, proceed with the installation outlined in steps 3 and 4 below. If your system does meet the requirements, skip to step 5.
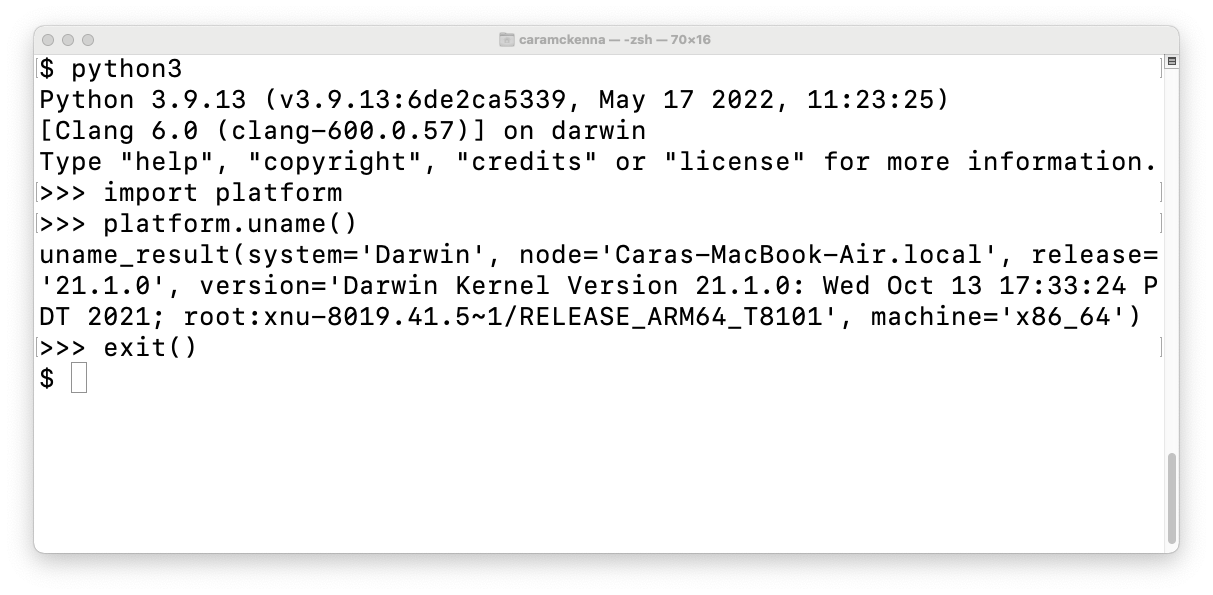
Fig. 1.1.2.1.1 Python: Kernel Version
Clink on the this link -> HydroUQ Download. On the browser page that this brings up, you will find various files and directories available for download. Locate the file named python-3.9.13-macosx10.9.pkg, which we copied from Python.org. Proceed to download this installer file.
Locate this installer file on your system and double click on it to start the installation process. Upon completion, a folder with several files will open, as shown in the figure below. Execute
Update Shell Profile.command.shandInstall CertificateCommand.shby double-clicking each.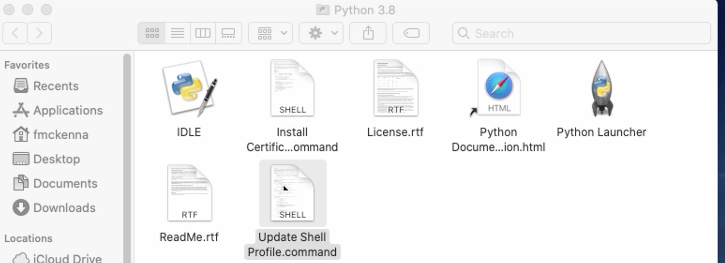
Fig. 1.1.2.1.2 Python: Folder Displayed at Conclusion of Install
In the terminal window you have opened in step 1, you need to issue the following 2 commands to ensure the command line tools for x-code and some additional python modules are installed:
xcode-select --install
python3 -m pip install --upgrade nheri_simcenter
If this step fails, see WARNING below.
Repeat steps 1 and 2 to ensure that python was correctly installed. See note below if you still see the incorrect version and platform in the
NEWterminal window.
Note
If step 5 was successfull and you still have the incorrect version of python installed after following the above steps, it probably means you forget to invoke the Update Shell Profile Command.command script at the end of step 4. You can still do it using Finder. Open Finder and navigate to the /Applications/Python 3.9 folder. Here you will see a number of files, including the two you forgot to run: Install Cerificates Command.command and Update Shell Profile Command.commnd. Double click on these files to run them. Finally repeat steps 1 and 2 again. If this still fails to produce the correct output for step 2, please contact us for direct support.
Warning
If step 5 above fails, it is because the system is finding a different version of python on your system. This is going to require you do additional things.
Firstly you need to create a python environment for your SimCenter applications. This is done by issuing the following set of commands.
cd ~
mkdir python_env
cd python_env
/Library/Frameworks/Python.framework/Versions/3.9/bin/python3 -m venv python_simcenter
source ./python_simcenter/bin/activate
python3 -m pip install --upgrade nheri_simcenter
Basically the commands will create a directory in your home folder called python_env and cd into it, the python3 -m venv python_simcenter will create the new python environment, which is contained in a directory python_simcenter. To activate this environment you source the script activate in the bin folder of this new directory. With the environment activated you can now install nheri-simcenter. If this too fails, please contact us.
When the application is actually running, you need to change the location of the python application that is run. To do this, in the top menu bar, under the tool icon select Preferences. Change the location of python, the first variable you can edit, to the python3 in the nee environment, i.e. /Users/YOUR_LOGIN/python_env/python_simcenter/bin/python3. Finally Press the Save button. Please note that YOUR_LOGIN needs to be replaced with your actual login!
1.1.2.4. Install OpenFOAM for macOS
This version of the HydroUQ app uses OpenFOAM for pre-processing the CFD model. At the backend, the mesh generation and visualization in the GUI utilize OpenFOAM-10 built-in meshing tools.
Note
The packaged distribution of OpenFOAM is only available for Linux systems. To install OpenFOAM on macOS, the user needs to use Docker for Mac. Docker will provide a virtual environment for running Linux applications on macOS.
To install OpenFOAM-10 on macOS, follow the instructions in OpenFOAM for macOS .
1.1.2.5. Download the Application
To download the HydroUQ app, navigate to the HydroUQ Download page which should resemble Fig. 1.1.2.5.6. The download page contains a list of downloadable files and directories.
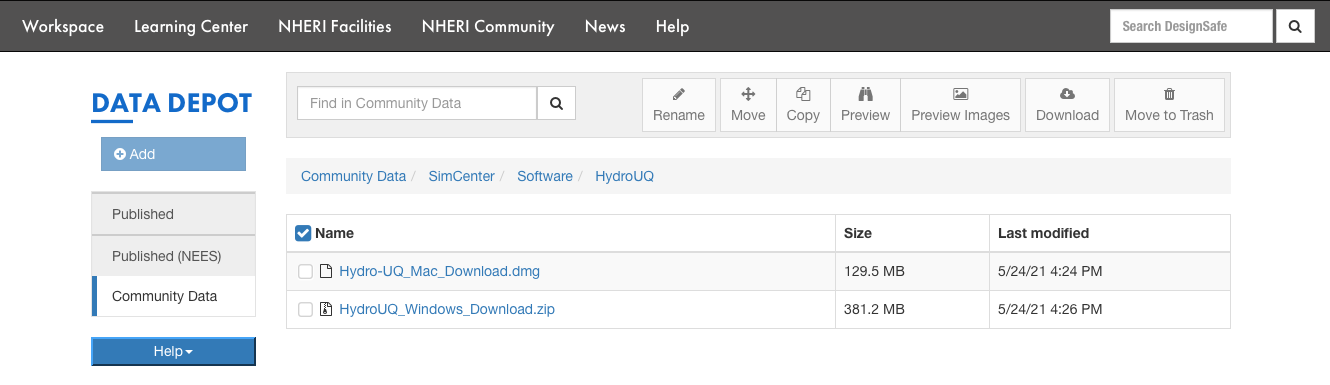
Fig. 1.1.2.5.6 HydroUQ tool download page.
Click on the file with a name ending with Mac_Download.dmg to download the HydroUQ app. In the pop-up window, click on the Download button in the bottom right corner. After the download is completed, open the dmg file and copy the HydroUQ app to a location in your filesystem.
Note
We suggest copying the application to your Desktop. After copying the application, you can move the dmg file to the trash or eject it.
1.1.2.6. Test the Installation
Once the installation procedure has been completed, it is a good practice to run some basic checks. Navigate to the location where you placed the application and open it by running the HydroUQ.exe executable.
Note
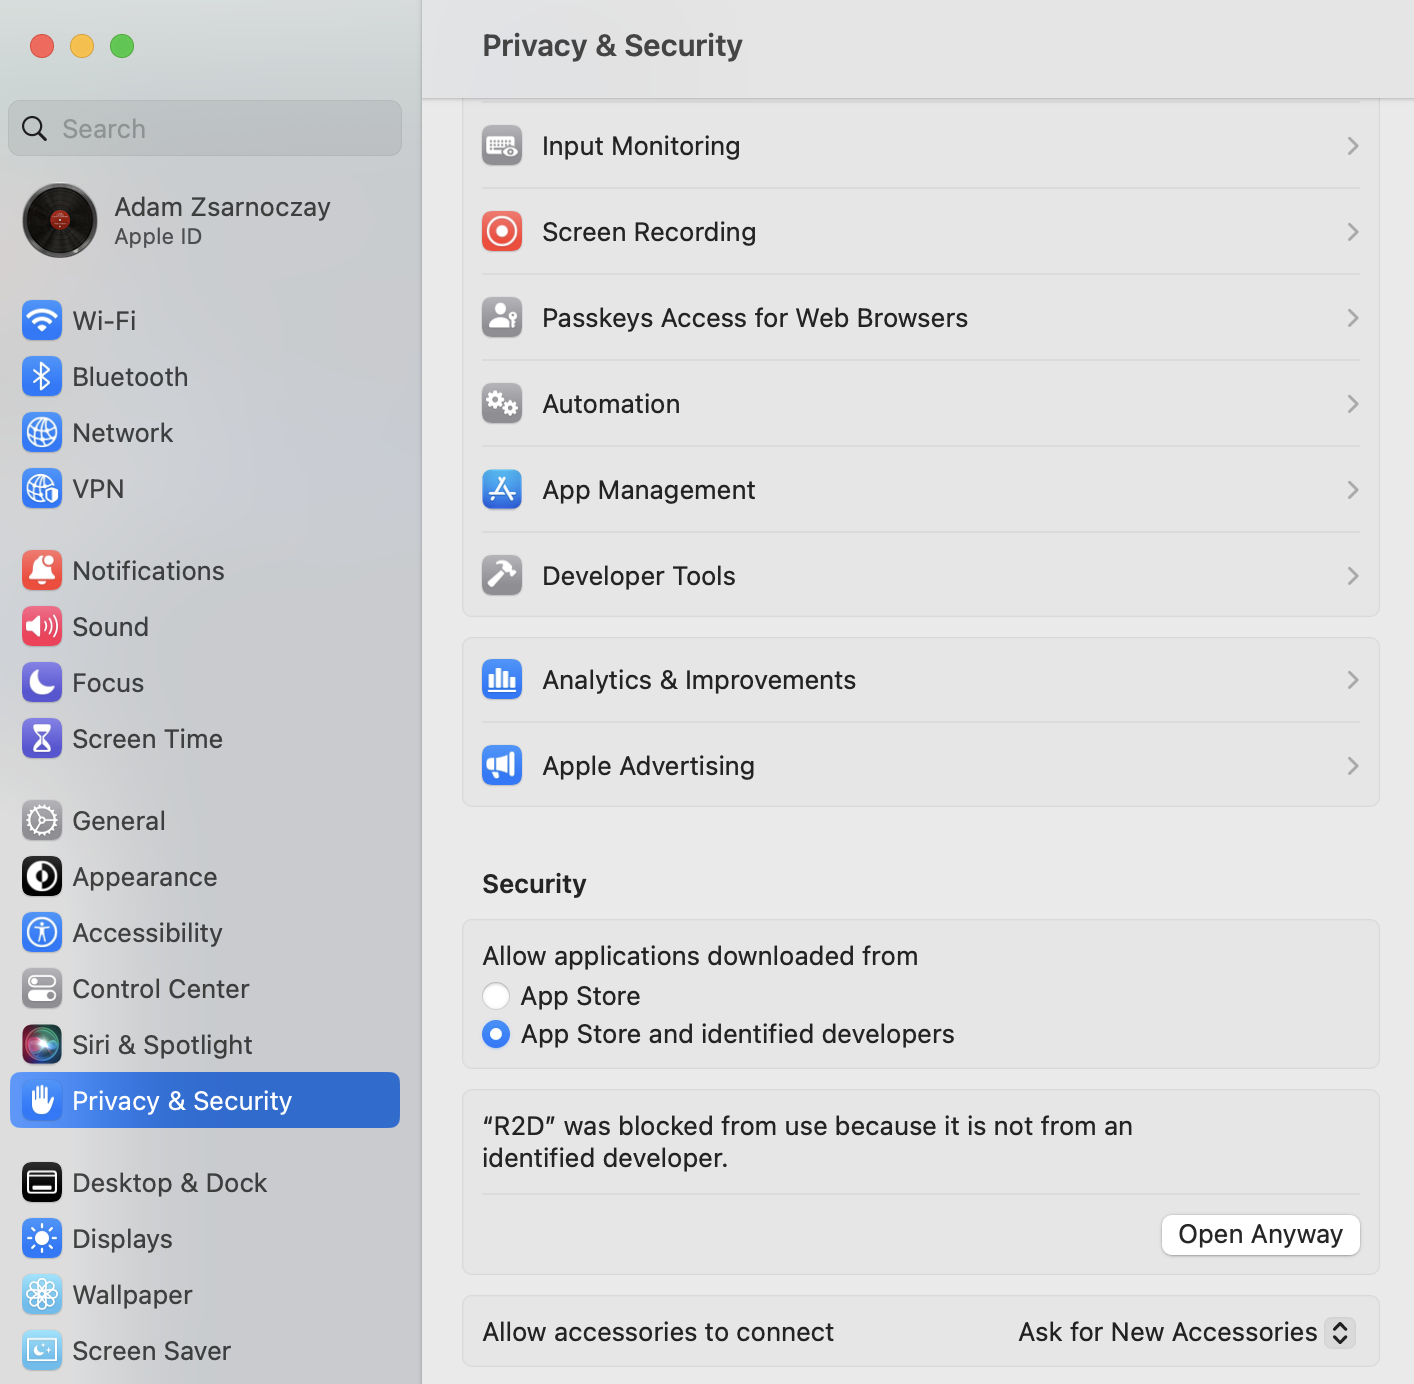
SimCenter apps are code-signed and notarized, but because they are not downloaded from the operating system’s app store, they may not be recognized as safe applications. Depending on your security settings, when you start a SimCenter app for the first time, your operating system may show a dialog box indicating it is unsafe. If this dialog appears, choose the cancel button. Try to start the app again, this time by right-clicking on it and selecting open.
If the app still fails to open. You need to go to System Settings->Privacy and Security. Under the Security section, you need to at least temporarily select the option to allow applications downloaded from the App Store and Identified Developers. With this checked try again. If it fails again, go back to System Settings->Privacy and Security. Just below the section you just checked, there should be some text about why the app was stopped and an option to Open Anyway, as shown in the figure below. Click on the button and the app should start.
Once the application starts, verify the setup by running an example problem Stochastic Wave Loading on a Frame Structure - JONSWAP Spectra, see Fig. 1.1.2.6.6.
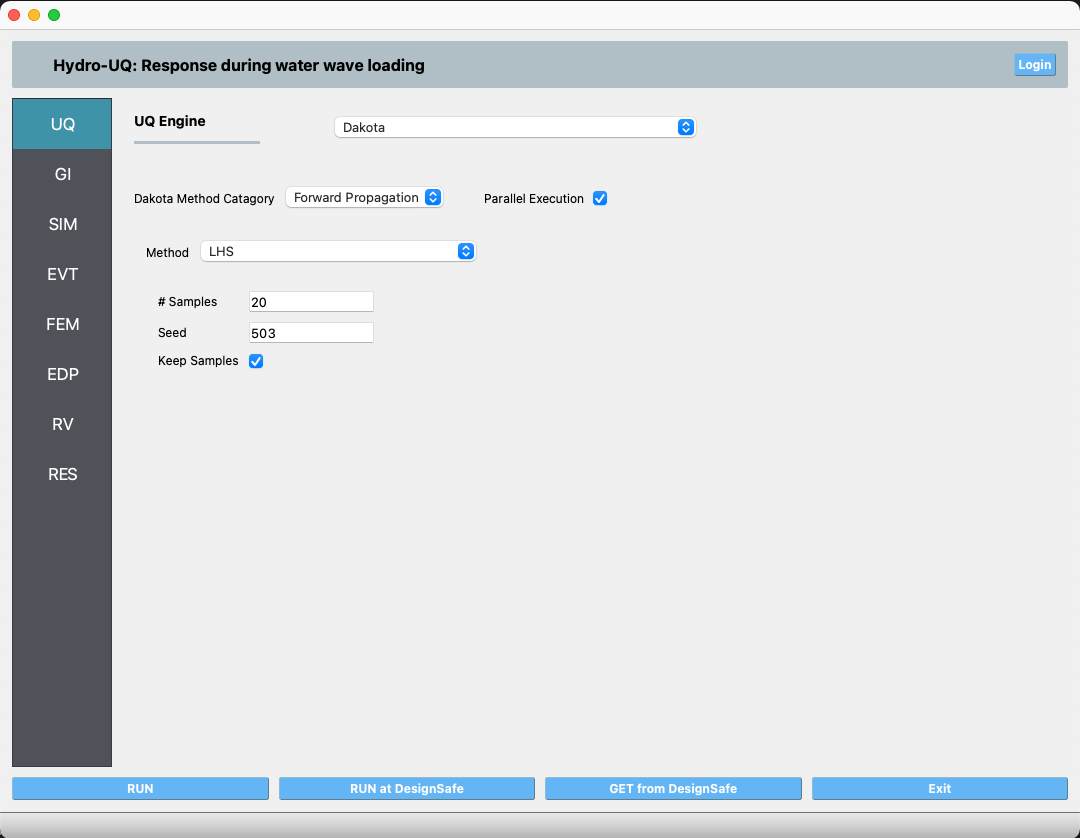
Fig. 1.1.2.6.6 HydroUQ application on startup.
Note
When the HydroUQ app is running, open the app/preferences or File/Preferences and make sure that python3 appears under External Applications:Python, as shown in the figure below. If you used older versions of SimCenter tools this was not the default. The exact location of Python3 that you installed can be found by opening the terminal application and executing the which python3 command. Enter the path shown as a response in the Preferences panel under Python and then press the Save button.
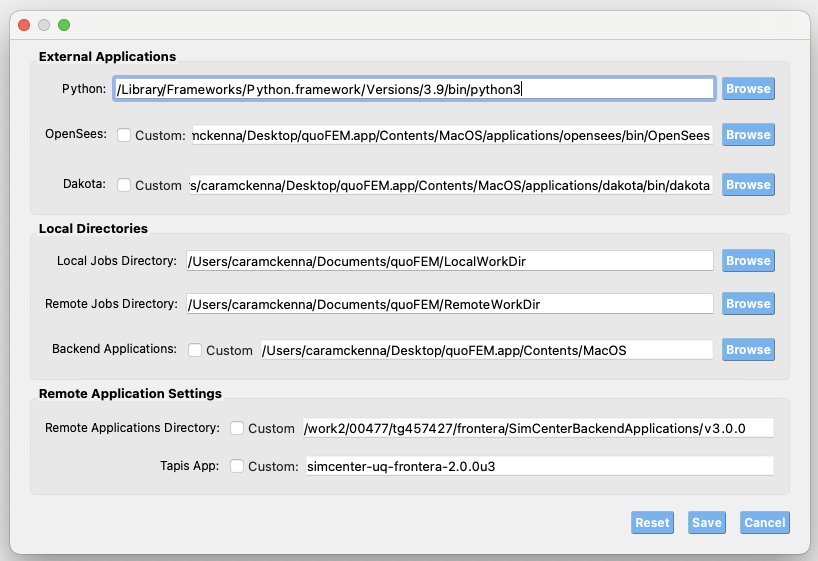
Fig. 1.1.2.6.7 Set Python Preferences.