This version of the WE-UQ app uses OpenFOAM for pre-processing the CFD model. At the backend, the mesh generation and visualization in the GUI utilize OpenFOAM-10 built-in meshing tools.
Note
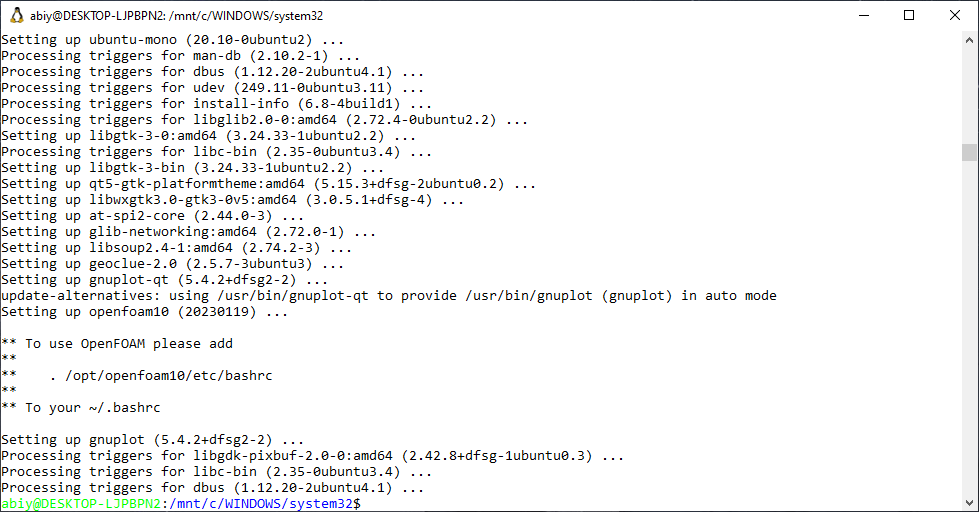
The packaged distribution of OpenFOAM is only available for Linux systems. To install OpenFOAM on Microsoft Windows 10, the user needs to use Windows Subsystem for Linux (WSL). WSL will provide a virtual environment for running Linux applications on Windows.
To install OpenFOAM-10 on Windows 10 or 11, follow the instructions below:
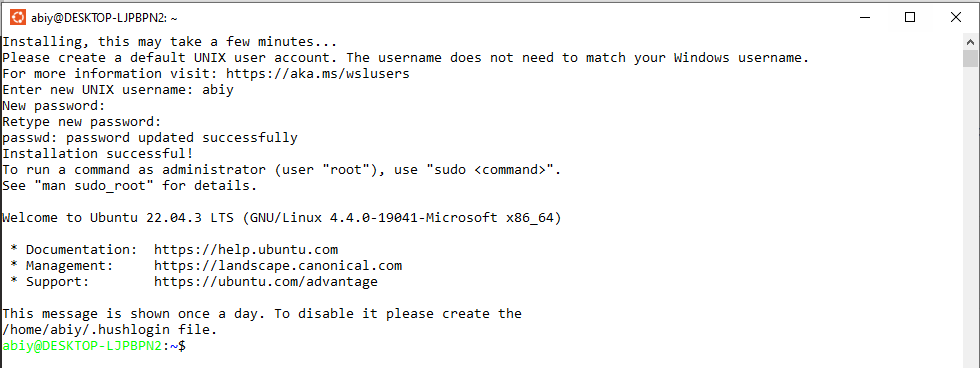
First, open PowerShell from the start menu and run it as an administrator. In the command window, type the following which will install all the necessary Linux features. For detailed instructions please follow Install WSL.
This will install Ubuntu distribution and launch a new linux terminal to configure the installation. Then, input your username and password to set up the system as shown below.
To verify that OpenFOAM has been installed correctly for WE-UQ, follow these steps:
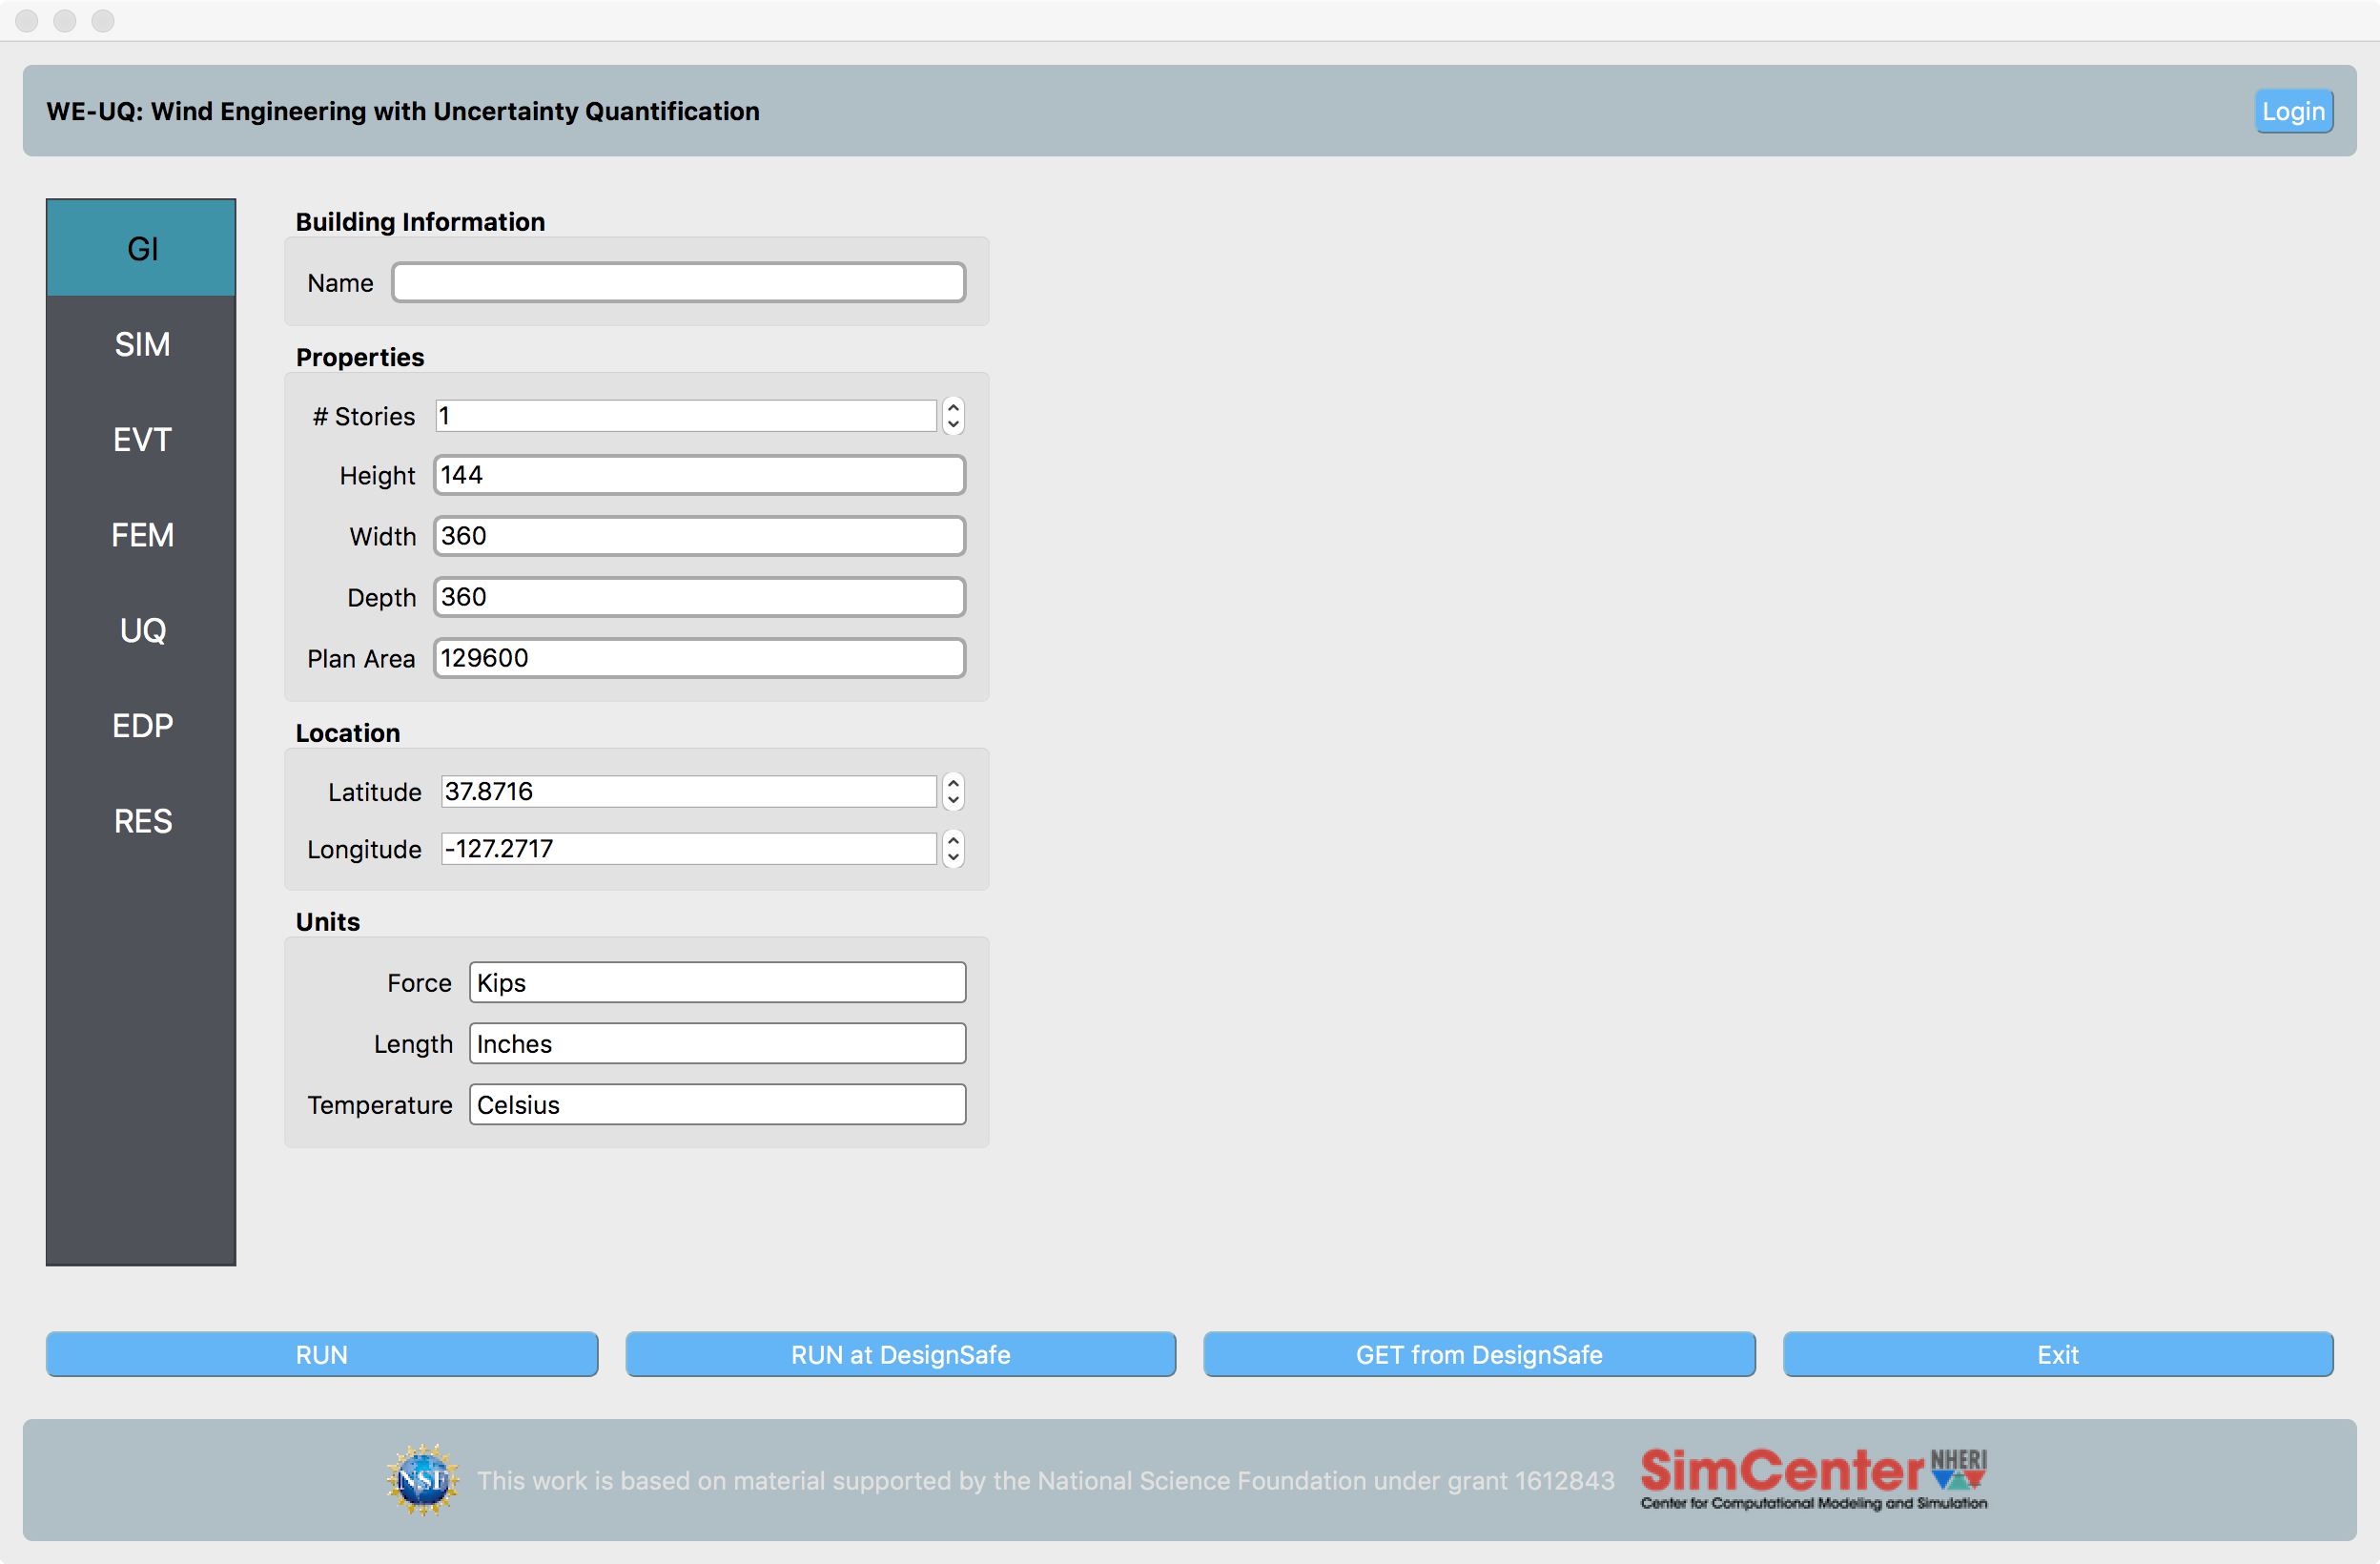
Once WE-UQ is installed, open the application. From the Examples pull-down menu, select Example E5. When this example loads, WE-UQ calls OpenFOAM in the background to create a mesh of the model. If the mesh does not display, OpenFOAM is not functioning correctly for your setup.
There are a few possible causes:
Missing .bashrc entry
During OpenFOAM installation, you are instructed to edit your .bashrc file.
If you have not done so, add the following line to the file:
./opt/openfoam10/etc/bashrc
You can edit the file using a text editor such as nano or vi.
Different default shell
If you have already added the above line, your Ubuntu system may be configured to use a shell other than the default bash shell. In that case, try replacing the previous line with:
source/opt/openfoam10/etc/bashrc
WE-UQ sets the path to it’s backend applications the first time the application starts. If you move the application subsequent to this or download the application again, you need to reset these paths. To do this go to File, Preferences and press the Reset and Save buttons.
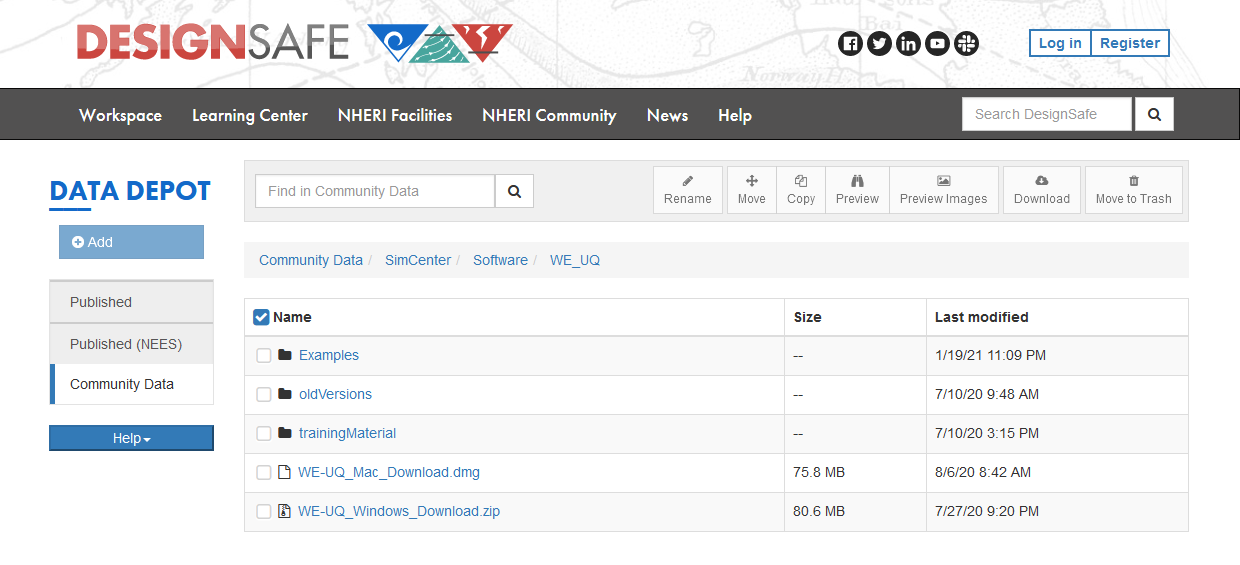
Navigate to the WE-UQ Download page, which should resemble Fig. 1.1.1.4.4, for a list of downloadable files and directories. Click the Windows_Download.zip file and select Download in the pop-up window’s bottom right.
After downloading, extract the zip file to your preferred location, such as C:/SimCenter/. You can create and move a shortcut of the WE-UQ.exe to your Desktop for convenience.
Tip
Use an external compressor like 7-Zip for faster extraction than the default Windows function.
After installation, perform basic checks by running the WE-UQ.exe from the installation directory.
Note
Since the SimCenter is not registered as a Windows vendor, our applications may trigger a warning about unsigned applications from unknown sources when you start the WE-UQ app for the first time. It is safe to bypass this warning for SimCenter applications.
Analysis failure may be due to the local working directory path defined in the preference menu. Check for:
Avoid setting the local working directory under cloud-synced folders like OneDrive or Box, which may cause file-not-found errors.
Avoid including non-alphabetic characters or spaces in the path, which may potentially lead to encoding or file-not-found errors.
Avoid setting the local working directory on a different drive than the app executable (.exe), which may result in permission errors, e.g. the executable is under the C drive, and the working directory is under the E drive.