MacOS Users
Install Location
The following set of instructions assumes all files will be placed in the bin folder in your home directory. You can of course place them anywhere you want, you just need to make appropriate changes to the env PATH settings discussed later. If you wish to follow our placement strategy, inside this bin folder create 3 additional folders named dakota, OpenSees, and FEAPpv.
Note
Placement of terminal applications in your home bin folder is common practice for the terminal applications on a MacOS system. It is a legacy practice from the operating system’s Linux heritage.
Python
The Mac comes with Python pre-installed, which is currently the somewhat dated version 2.7. We recommend installing Python 3.7 from Python.org. We recommend installing using the macOS 64-bit installer. The installer used to place a python3 executable in your /usr/local/bin directory, whose location should be on your system PATH, Version 3.8 does not appear to do so anymore, see the note below.
Note
We use the Python.org installation over others, due to its simplicity of installation.
The current installation of Python leaves two script files in a folder when the installation ends. You need to execute both script files to get Python set up correctly so that it can be invoked from the terminal. To execute the files, double-click on them. The two files, shown in the image below, are Update Shell Profile.command.sh and Install CertificateCommand.sh.

Python: Folder Displayed at Conclusion of Install
Once Python is installed, you need to extend it by installing the following packages: numpy, scipy, and pandas. To install these packages, start a terminal window and type the following instructions:
pip3 install numpy
pip3 install scipy
pip3 install pandas
pip3 install tables
pip3 install hdf5
Note
To start a terminal window you can use the spotlight app (magnifying glass at the top right corner of the desktop). Start the spotlight app and type in “terminal”. The terminal application should appear as the top hit. Click on it to start it.
When the quoFEM app is running, open the File/Preferences and make sure that python3 appears under External Applications:Python. If you used older versions of SimCenter tools this was not the default.
If you forget to invoke the UpdateShellProfile.command.sh” script at the end of the install, you can always edit the correct shell file later to add the **PATH variable.
As an alternative, you can install the SimCenter’s pelicun module, which will include all three of the above
pip install pelicun
Dakota
Dakota is the default UQ engine used by the quoFEM app that is publicly available from the Dakota Download page. The download page offers an extensive list of downloadable files. You can narrow this down to the file to be selected by selecting MacOS in the Platform, 6.10 in the Release, and Command Line Only for the interface type. In the Public area you should now only have a single option, click on the link to download Dakota. When you extract the files that you download, they will all be contained in a single folder. Rename this folder dakota-6.10.0 and move that folder to your bin/dakota folder.
OpenSees
OpenSees is one of the FEM engines used by the quoFEM app that is publicly available from the OpenSees Download page. To download the OpenSees you have to enter your email address, which may also require you to register (that requirement is going away and may be gone by the time you read this). At the bottom of the page under the section Mac Version is a table with two links: one for the OpenSees and also a link to Tcl, whose libraries OpenSees needs on your computer to run. You will need to follow both links to download both applications.
- Steps to Install OpenSees on a Mac:
Follow the OpenSees link and download the OpenSees.zip file. Uncompress the file and you will have an OpenSees-3.1.0 folder. Move that folder to the bin/OpenSees folder.
Download and run the Tcl installer.
Note
The additional requirement of installing Tcl is about to be removed from the OpenSees installation process. If the table for the Mac Download does not contain a second link, it has been removed and no Tcl install is required.
FEAPpv
FEAPpv is another FEM engine used by the quoFEM app that is publicly available from the FEAPpv page. FEAPpv is a general-purpose finite element analysis program that is designed for research and educational use. To install FEAPpv you must download the source code and follow the build instructions on the Source Code Download and Compile Instructions section of the FEAPpv page.
OpenSeesPy
OpenSeesPy is another FEM engine used by the quoFEM app that is publicly available using pip.
pip install OpenSeesPy
Warning
At the time of writing, OpenSeesPy is not available through pip.
Note
FEAPpv, OpenSees, and OpenSeesPy only need to be installed on the local machine if you intend to run the applications locally.
In addition, if the intent is to run locally, only those applications you intend to use need to be installed, i.e. if you only intend to run FEAPpv then OpenSees and OpenSeesPy need not be installed. The other applications are only needed if you want to use them. If not installed and you select that application, the backend application will fail when you press the
Runbutton.
Edit Your Shell file
On Linux systems, the shell is the program that takes commands from the keyboard that you enter in the terminal window and passes them to the operating system to perform by invoking applications and passing data between applications. In the good old days, it was the only interface available to the user, i.e. there was no such thing as Finder! Several shell programs can be installed and made available to you. The most popular is the bash shell, the up and the up-and-coming one is the Z shell. Power MacOS users will write shell scripts to do many many useful things. By default the applications that the shell program will invoke are limited to applications in a few specific directories that are defined in the user’s PATH. Users can modify this path by editing files that the shell program will read from every time the program is started.
When the frontend application is running the computations it is actually running a backend application using the shell program. As a consequence the shell program must be made aware of the locations of some of the external applications that you have installed as OpenSees and dakota do not provide installers that automatically do this when they are installed. Other applications, like Tcl provide scripts that you invoke to do it. In short, you have to edit the file appropriate to the shell you are using.
To find which shell program you are using when you issue commands inside the terminal window, type the following in a terminal window:
env | grep SHELL
If the result is /bin/bash you will need to edit the .bashrc file or the bash_profile file. If the result is /bin/zsh you will need to edit the .zshrc or .zprofile. Typically the .bash_profile or the .zprofile file is the one to edit as these typically by design will invoke the .bashrc or .zshrc file. If in doubt, look for the files and see where Python placed its modifications. In your home directory type:
env | grep SHELL
Finally, you want to edit that file so that the applications will find OpenSees and Dakota. The format depends on the shell, just copy the format that Python used, e.g. my .bash_profile file has the lines:
export PATH=$HOME/bin:$PATH
export PATH=$HOME/bin/dakota-6.10.0/bin:$PATH
export PYTHONPATH=$HOME/bin/dakota-6.10.0/share/dakota/Python
Test the Install of Python, OpenSees & Dakota
- Steps to Test the Installation of the Applications:
Open a terminal window (type
terminalin spotlight search)Type
python3(this should bring up the Python interpreter)Enter the following to test the installation of the modules and quit the application:
import numpy
import scipy
import pandas
quit()
Type
OpenSees(this should bring up the OpenSees interpreter).Enter the following to exit this program:
exitType
dakota(this should start the Dakota application which should give some error messages).
Note
Apple, in the latest release of their operating system, MacOS 10.16 Catalina, has changed the default working of Gatekeeper. Gatekeeper, first introduced in OS X Mountain Lion, is a Mac security feature that helps protect your Mac from Malware and other malicious software. Gatekeeper checks to make sure the application is safe to run by checking it against the list of apps that Apple has vetted and approved for the Apple Mac Store and/or approved by Apple even if not offered through the app store. In previous versions of MacOS, Gatekeeper had three security level options: App Store, App Store and Identified Developers, and Anywhere. Anywhere has been removed and this will cause problems with Dakota.
Apple has greatly increased security with Catalina and now by default terminal applications can no longer run if they are downloaded from the internet and not signed by a recognized Apple developer. To overcome this issue, before you start issuing the above commands in a terminal, open System Preferences/Security and Privacy. As you issue the commands, click the Cancel button in the window that pops warning you the application cannot be opened because the Developer cannot be verified up and then click the button Allow Anyway that now appears beside the application name in the Security and Privacy window, as shown in the figure below. Rerun the application and it should now work without the warning window popping up.
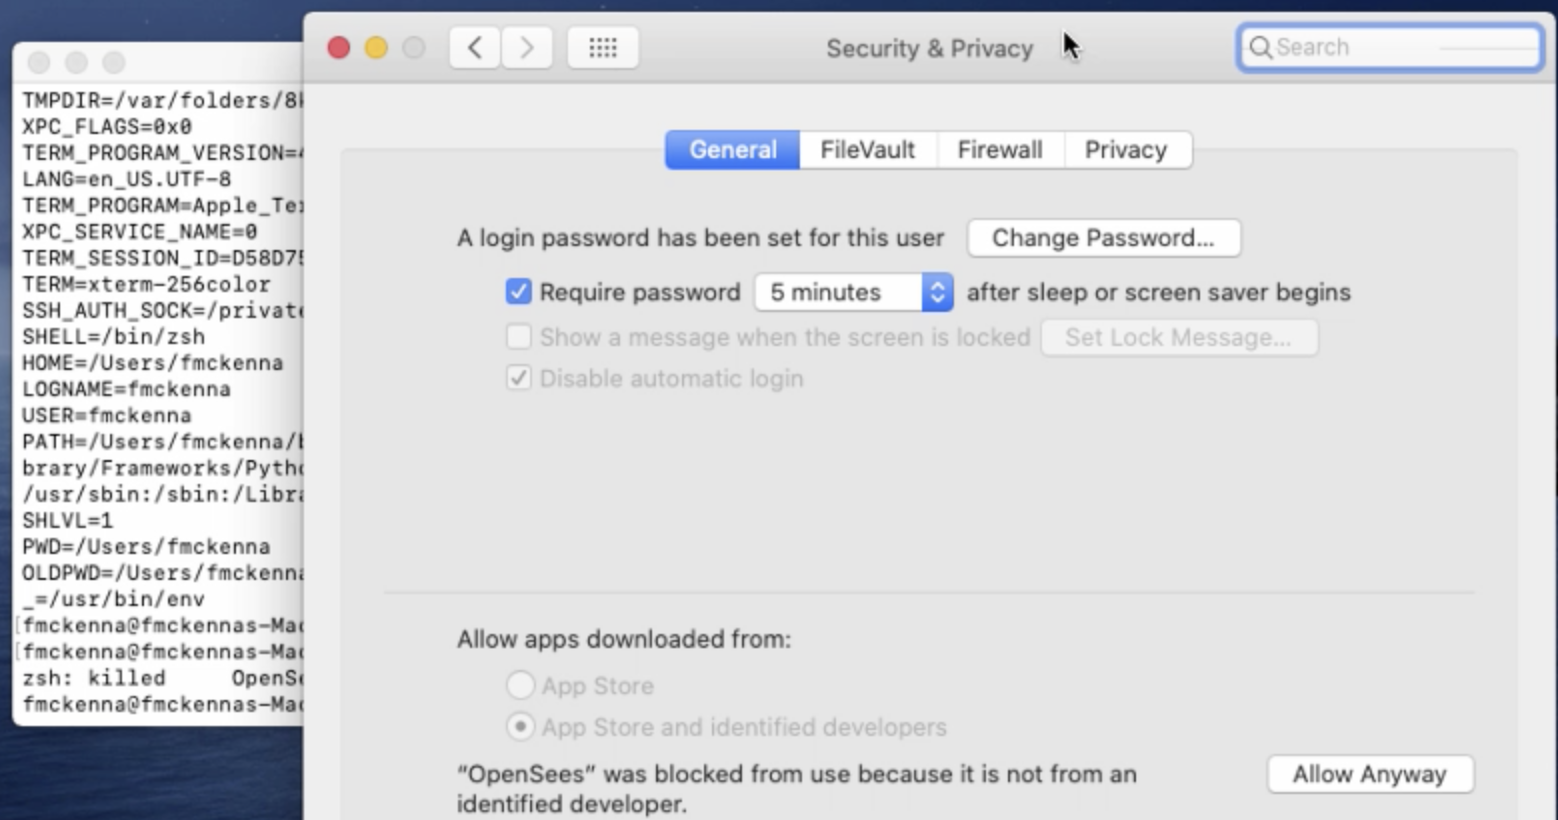
Catalina: Security and Privacy Panel for Unsigned Terminal Applications.
Warning
Dakota has even more trouble installing on Catalina. Not only is the developer not known, but the application relies on code from other unsigned developers. As a consequence, the above workaround for most terminal applications fails. For dakota, in the terminal, we have to turn off gatekeeper even after we have o.k.’d the application for running. Issue the following commands inside the terminal window:
sudo spctl --master-disable
dakota
sudo spctl --master-enable
This will temporarily disable gatekeeper (basically setting Gatekeeper options to Anywhere), allow the Dakota application and its .dylib files to be registered as safe, and then turn Gatekeeper options back to default.