3. User Interface
The quoFEM app is a scientific workflow application that creates workflows and runs them in the background. These workflows can integrate multiple applications, as detailed in the backend and workflows section (Software Architecture). Upon launching quoFEM app, users are presented with the user interface (UI) shown in Fig. 3.1. This UI facilitates the selection of workflow applications, configuration of application parameters, initiation of workflows either locally or remotely, and visualization of simulation outcomes.
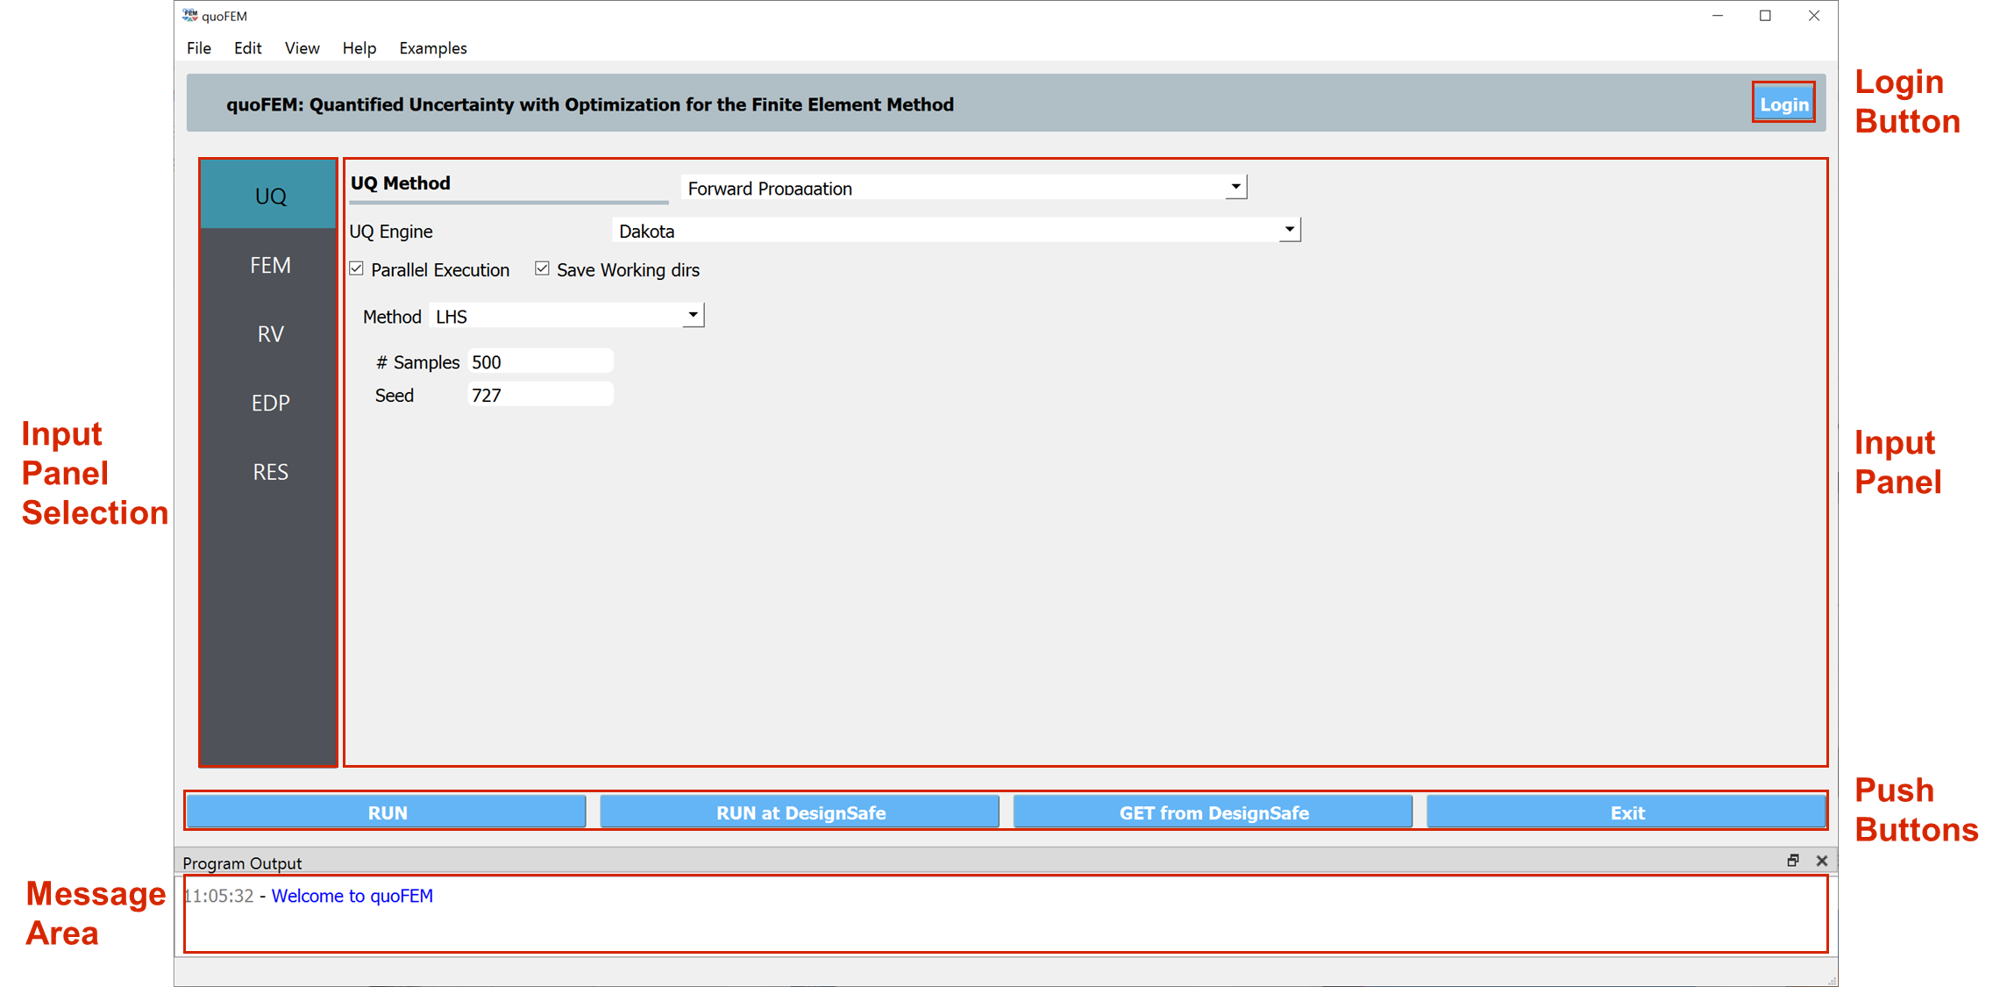
Fig. 3.1 The quoFEM app user interface.
The main window of the UI comprises the following key components:
Login Button
The Login button, at the top right of the user interface, is used to log in to DesignSafe. You can launch jobs on DesignSafe after logging in. You don’t need to log in to DesignSafe to run the analyses on your local computer. You can register for an account on the DesignSafe-CI website 1.Message Area
The message area is located at the bottom of the UI and displays the status and error messages for a running background application. The message area is a dockable dialog that can be resized, moved, and closed as needed. The dialog visibility can be toggled by clicking on the menu item View -> Program Output. If moved from its default location, the status dialog can be restored to the bottom of the UI by dragging the dialog back to the bottom of the UI and hovering over the area.Input Panel
The input panel is the large central area of the user interface where the user provides input for the workflow applications. You can select a workflow application using the drop-down menu at the top of each input panel. Each panel collects input parameters and paths to files with input data for the selected workflow application. The RES (results) panel is different; it shows the results after a simulation is completed.Input Panel Selection Ribbon
The ribbon on the left side provides buttons that represent each step of the simulation workflow (e.g., EVT: Event Description, SIM: Structural Model, RES: Results). Clicking on one of these buttons shows the corresponding workflow applications in the central input panel.The following sections of the user guide describe in detail each of the steps presented in the input panel selection ribbon and the corresponding workflow applications available in the tool:
Push Buttons
This is the area near the bottom of the UI with the following four buttons:RUN: Run the simulation locally on your computer.
RUN at DesignSafe: Process the input information and send the data to DesignSafe. The simulation will be run there on a supercomputer and the results will be stored in your DesignSafe jobs folder.
GET from DesignSafe: Obtain the list of jobs you ran on DesignSafe. You can select a job to download its results to your computer.
Exit: Close the application.
Running Jobs Remotely
Warning
Before you can run a job at DesignSafe, you need a current TACC HPC allocation. To obtain such you need to submit a ticket to TACC with words similar to “Hello, I would like an initial HPC allocation to explore the SimCenter applications”. For users of previous versions of the tools, this is a new requirement required due to changes to the revised software used to communicate with these HPC machines.
Clicking on the RUN at DesignSafe button will show the remote job submission dialog shown below (Fig. 3.8)
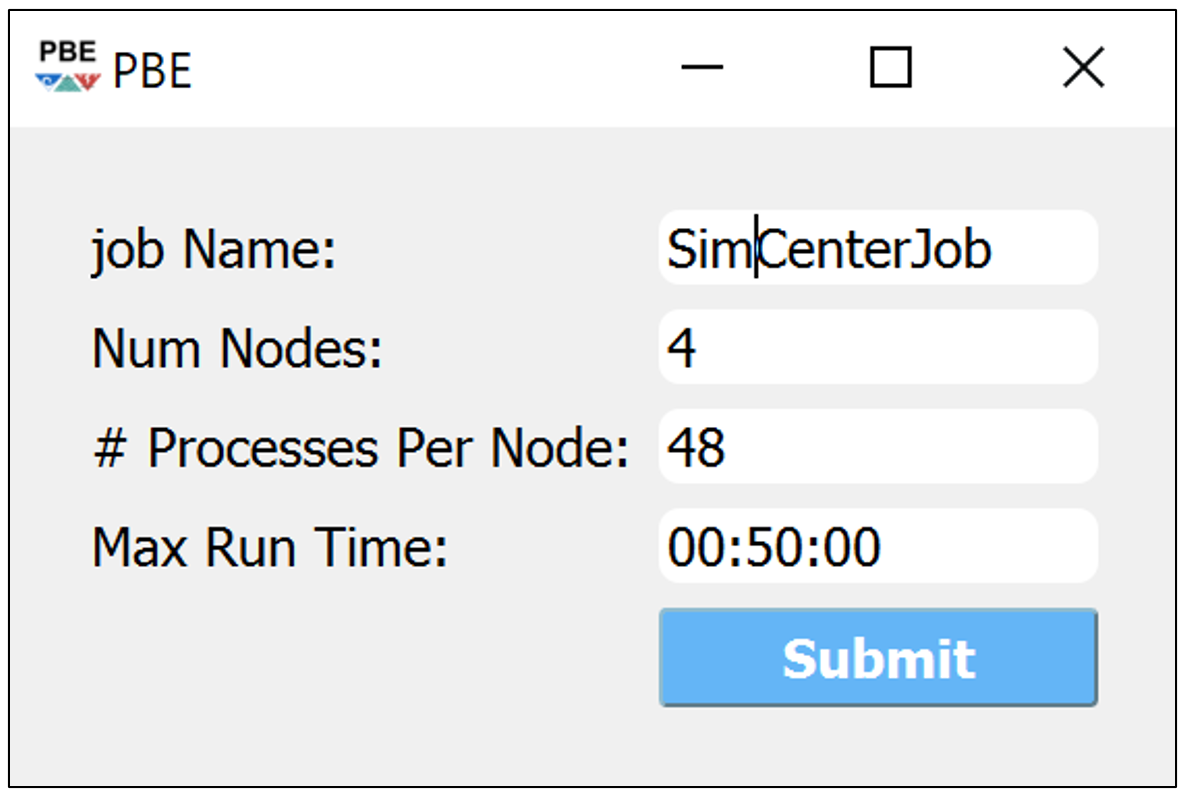
Fig. 3.8 Remote job submission dialog.
- 1
For more help on external services provided by DesignSafe-CI, such as creating an account, we encourage users to explore their documentation or consider submitting a ticket.
Overview of User Interface
Recorded in tool training, 2022 (From 21:14 to 26:58)
Click to replay the video from 21:14. Please note there were minor changes in the user interface since it is recorded.
Click here to watch Video Overview