5.9. Custom UQ for UQpy
Problem files |
This example illustrates how quoFEM can interface a custom UQ engine. A simple forward propagation is conducted using UQpy, a python package for general uncertainty quantification problems.

Consider a two-dimensional truss structure that has uncertain properties that all follow uniform distribution:
Random Variable |
lower bound |
upper bound |
|---|---|---|
Elastic modulus, E |
150 |
200 |
Load, P |
15 |
35 |
Cross sectional area of the upper three bars, Au |
400 |
600 |
Cross sectional area of the other six bars, Ao |
200 |
300 |
The goal of the exercise is to implement UQpy as a custom UQ engine and estimate the mean and standard deviation of the vertical displacement at node 3.
Note
The UQpy python package is required to be installed to run this example, e.g. pip install UQpy
5.9.1. UQ Workflow
Start the application and the UQ Selection will be highlighted. In the panel for the UQ selection, change the UQ Engine to CustomUQ.

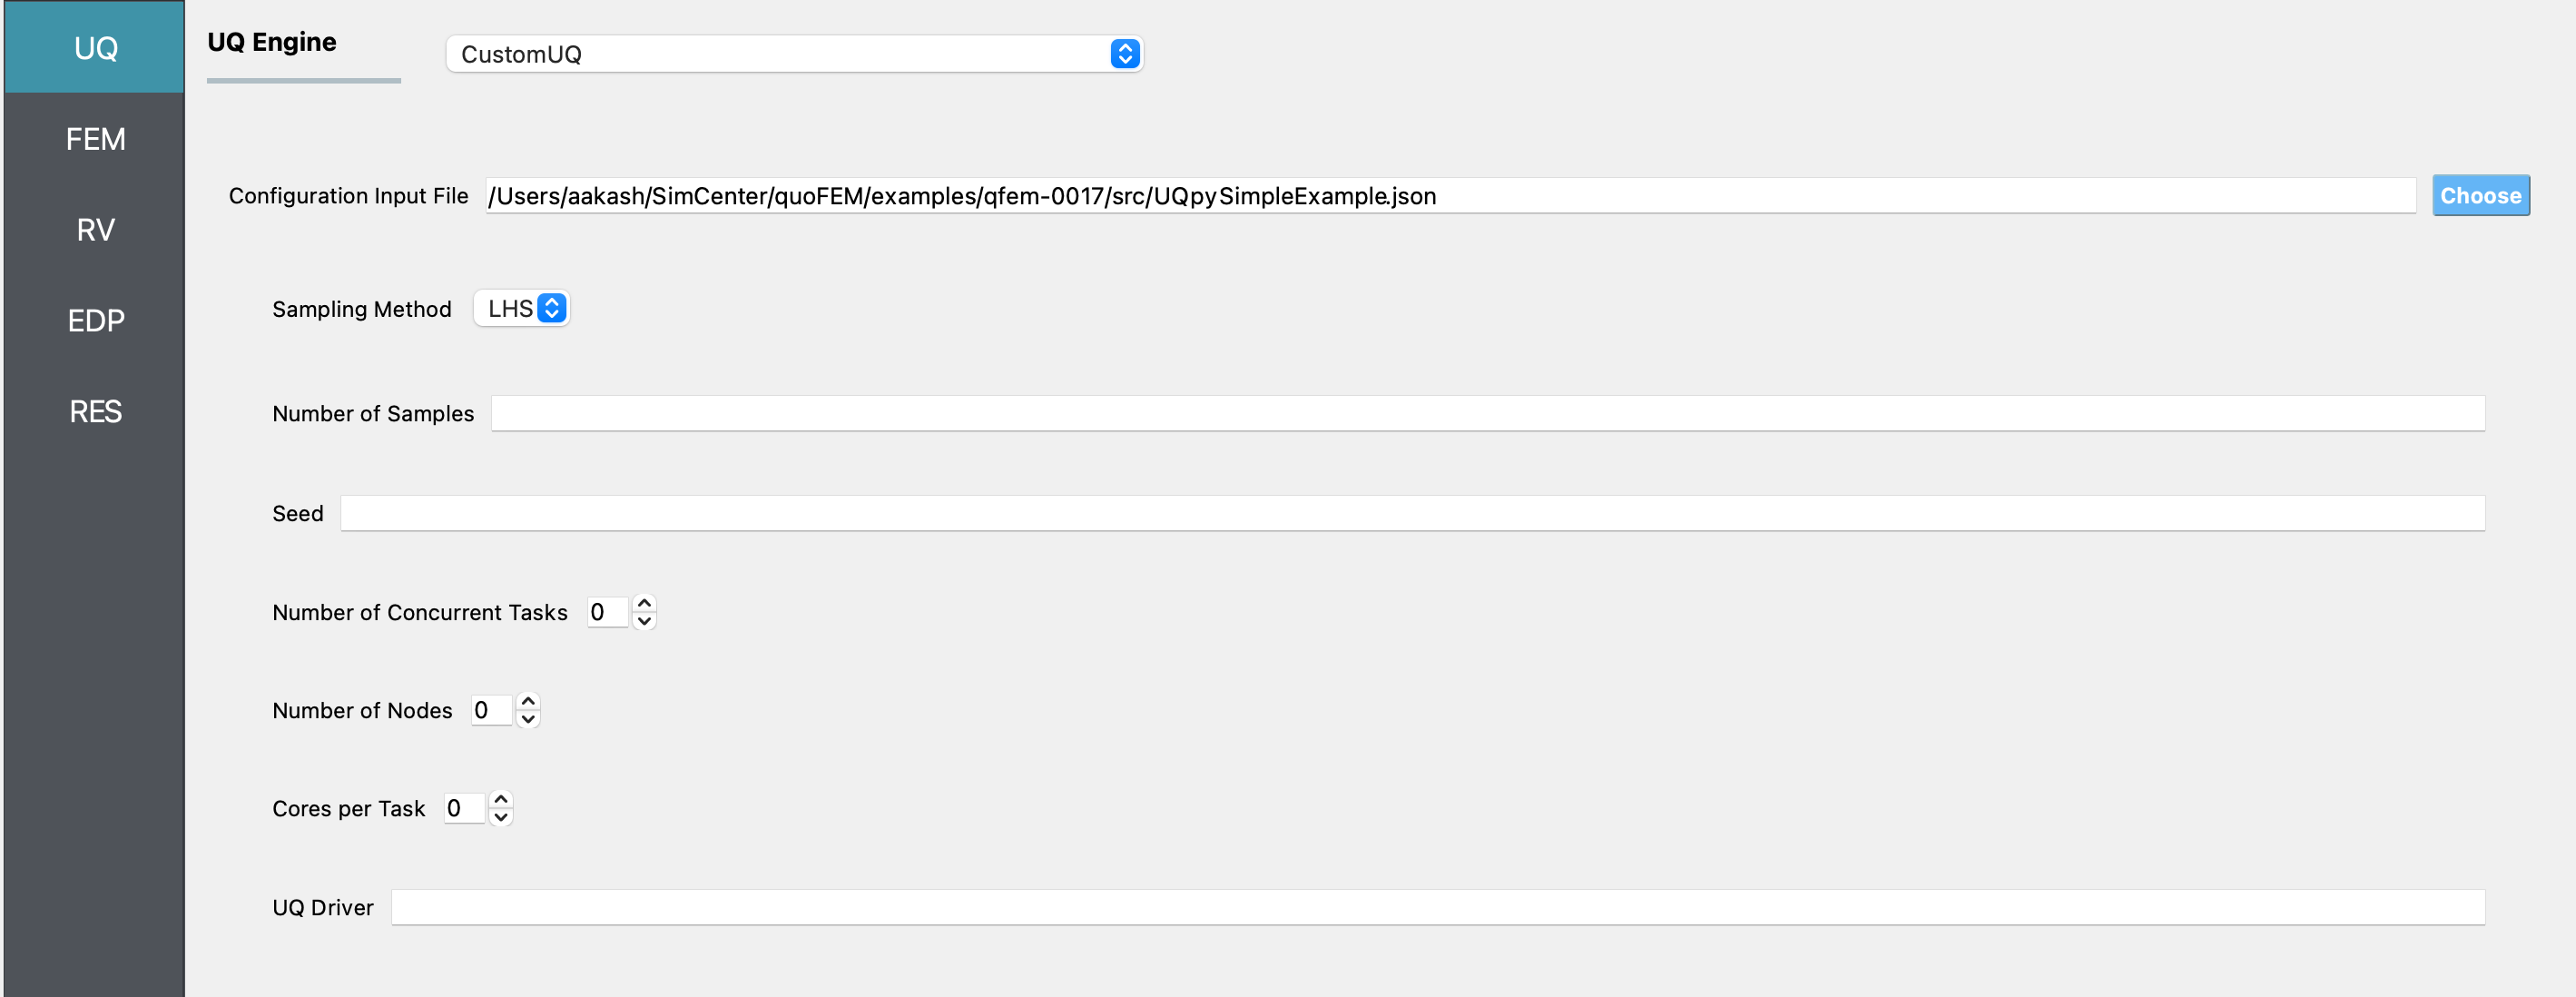
Next, provide the configuration input file path. In the configuration file, users specify the interface for the parameters (type, name, values of each parameters) required for the custom UQ analysis. The provided script will generate 1 combo box to define sample types, 2 line edit fields to define the number of samples and seed, 3 spin boxes to define number of concurrent tasks, nodes, and cores per task, and 1 line edit field to specify the UQ Driver.
{
    "Parameters" :  [
	{
		"type" : "ComboBox",
		"name" : "Sampling Method",
		"values" : ["MCS"]
	},
	{
		"type" : "LineEdit",
		"name" : "Number of Samples"
	},
	{
		"type" : "LineEdit",
		"name" : "Seed"
	},
	{
		"type" : "SpinBox",
		"name" : "Number of Concurrent Tasks"
	},
	{
		"type" : "SpinBox",
		"name" : "Number of Nodes"
	},
	{
		"type" : "SpinBox",
		"name" : "Cores per Task"
	},
	{
		"type" : "LineEdit",
		"name" : "UQ Driver"
	}
    ]
}
Note that configuration input file specifies the front-end interfaces while the back-end interface should be modified in the backend directory (Refer the Configuring CustomUQ Engine section for details). As an example, UQpy has been already implemented in the customized backend where users can find at {Backend Applications Directory}/applications/performUQ/other, where the {Backend Applications Directory} is specified from the file-preference in the menu bar). Once the UQpySimpleExample.json is called, the following customized user interface will appear in UQ panel.

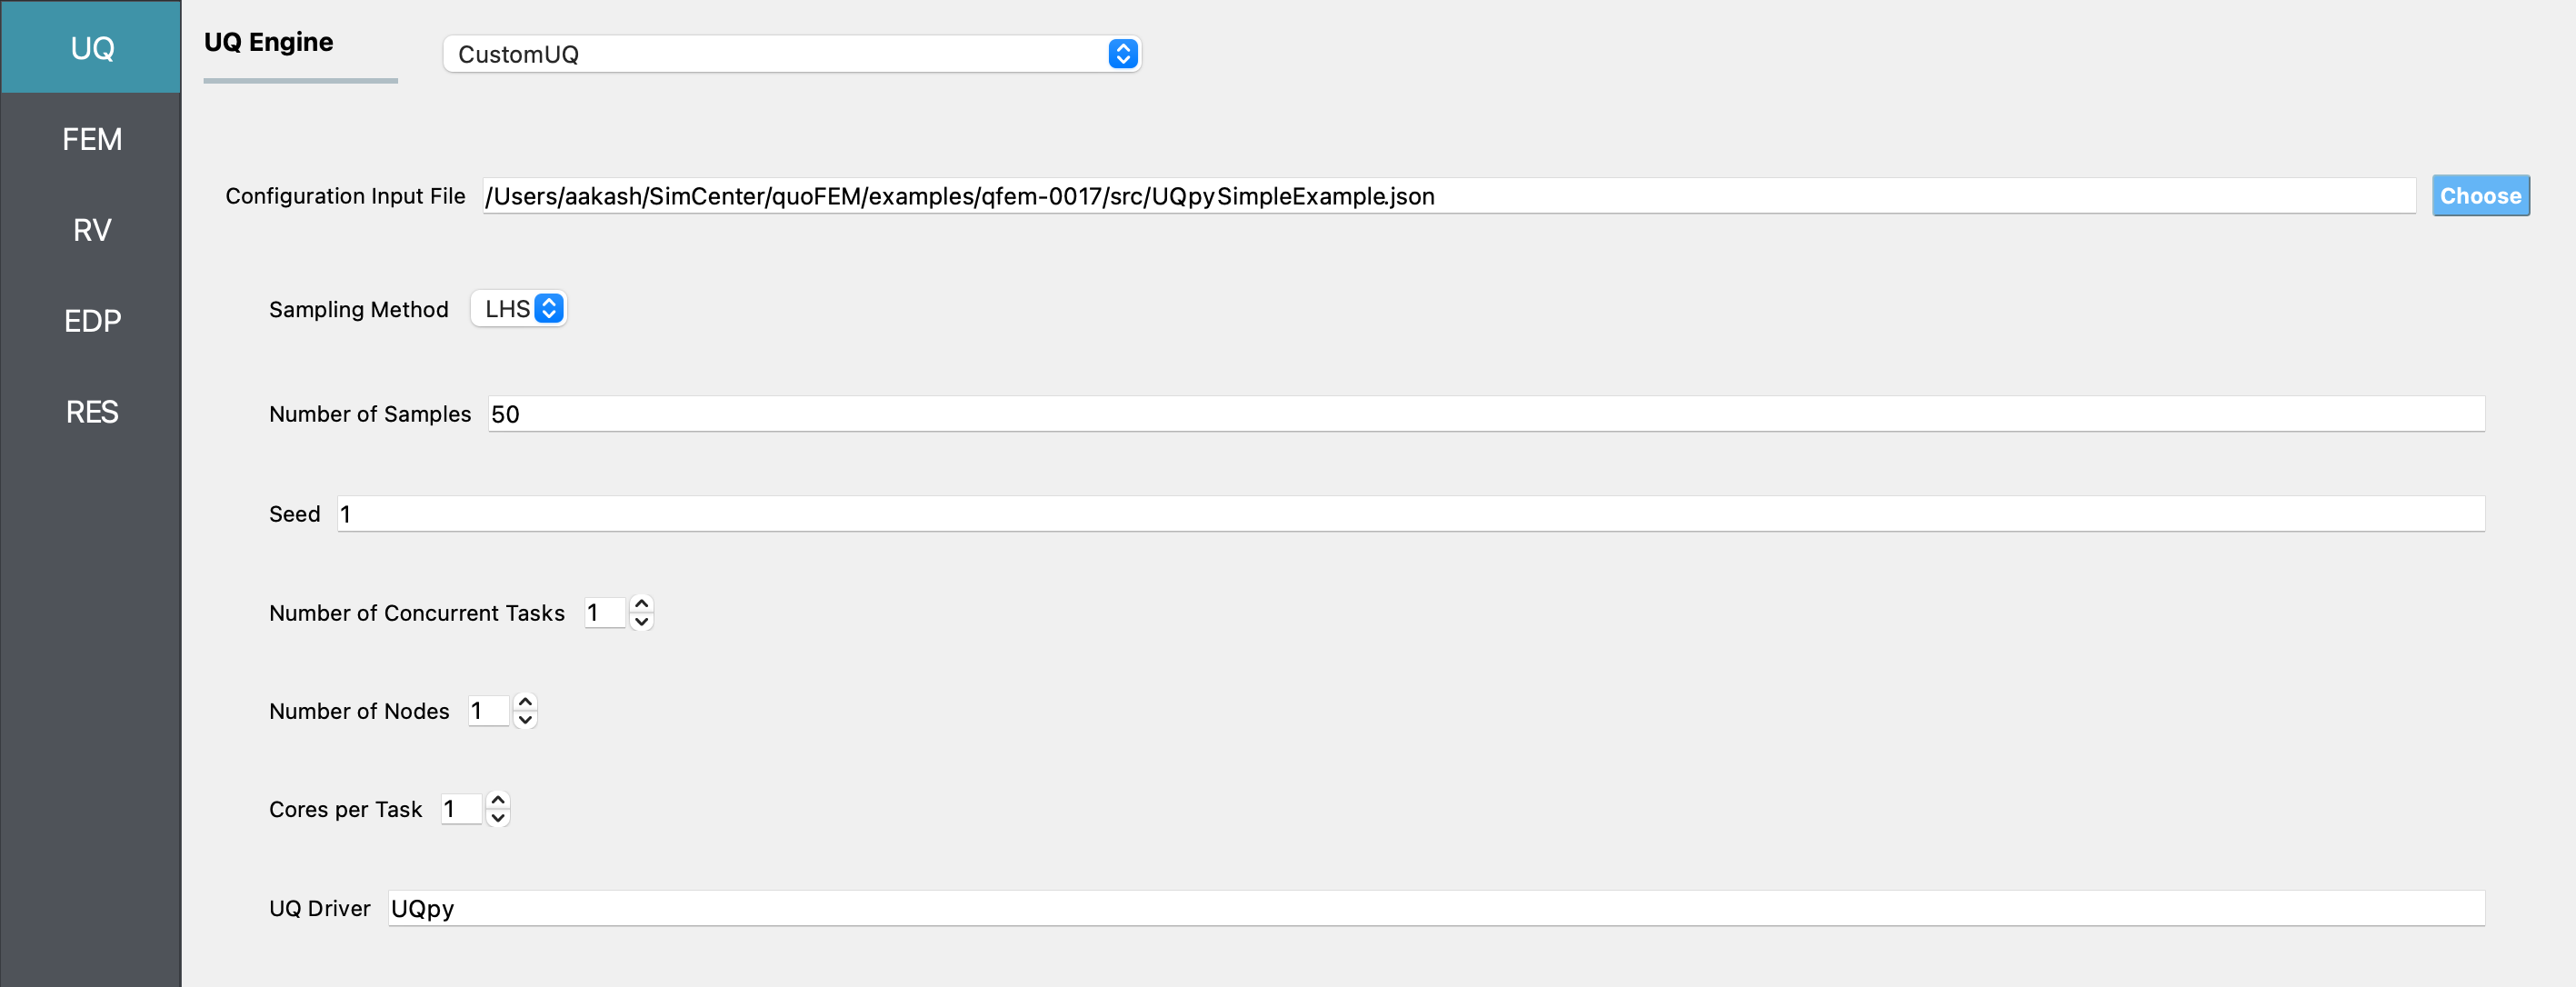
Let us sample 50 samples by Latin hypercube sampling (LHS). The UQ Driver field must be filled in as UQpy, as shown in the following figure.

Select the FEM tab from the input panel. For the main script copy the path to the
TrussModel.tclor select choose and navigate to the file. For the post-process script field, repeat the same procedure for theTrussPost.tcl script. (See example Two-Dimensional Truss: Sampling, Reliability and Sensitivity for the model details)

Select the RV tab from the input panel. This should be pre-populated with four random variables with same names as those having
psetin the tcl script. For each variable, from the drop down menu change them to uniform and provide the lower and upper bounds specified for the problem.

Note
Only uniform distribution is supported in this preliminary example.
Next select the QoI tab. Here enter
Node_3_Disp_2for the one variable.

Next click on the Run button. This will cause the backend application to launch the CustomUQ engine which will run UQpy.
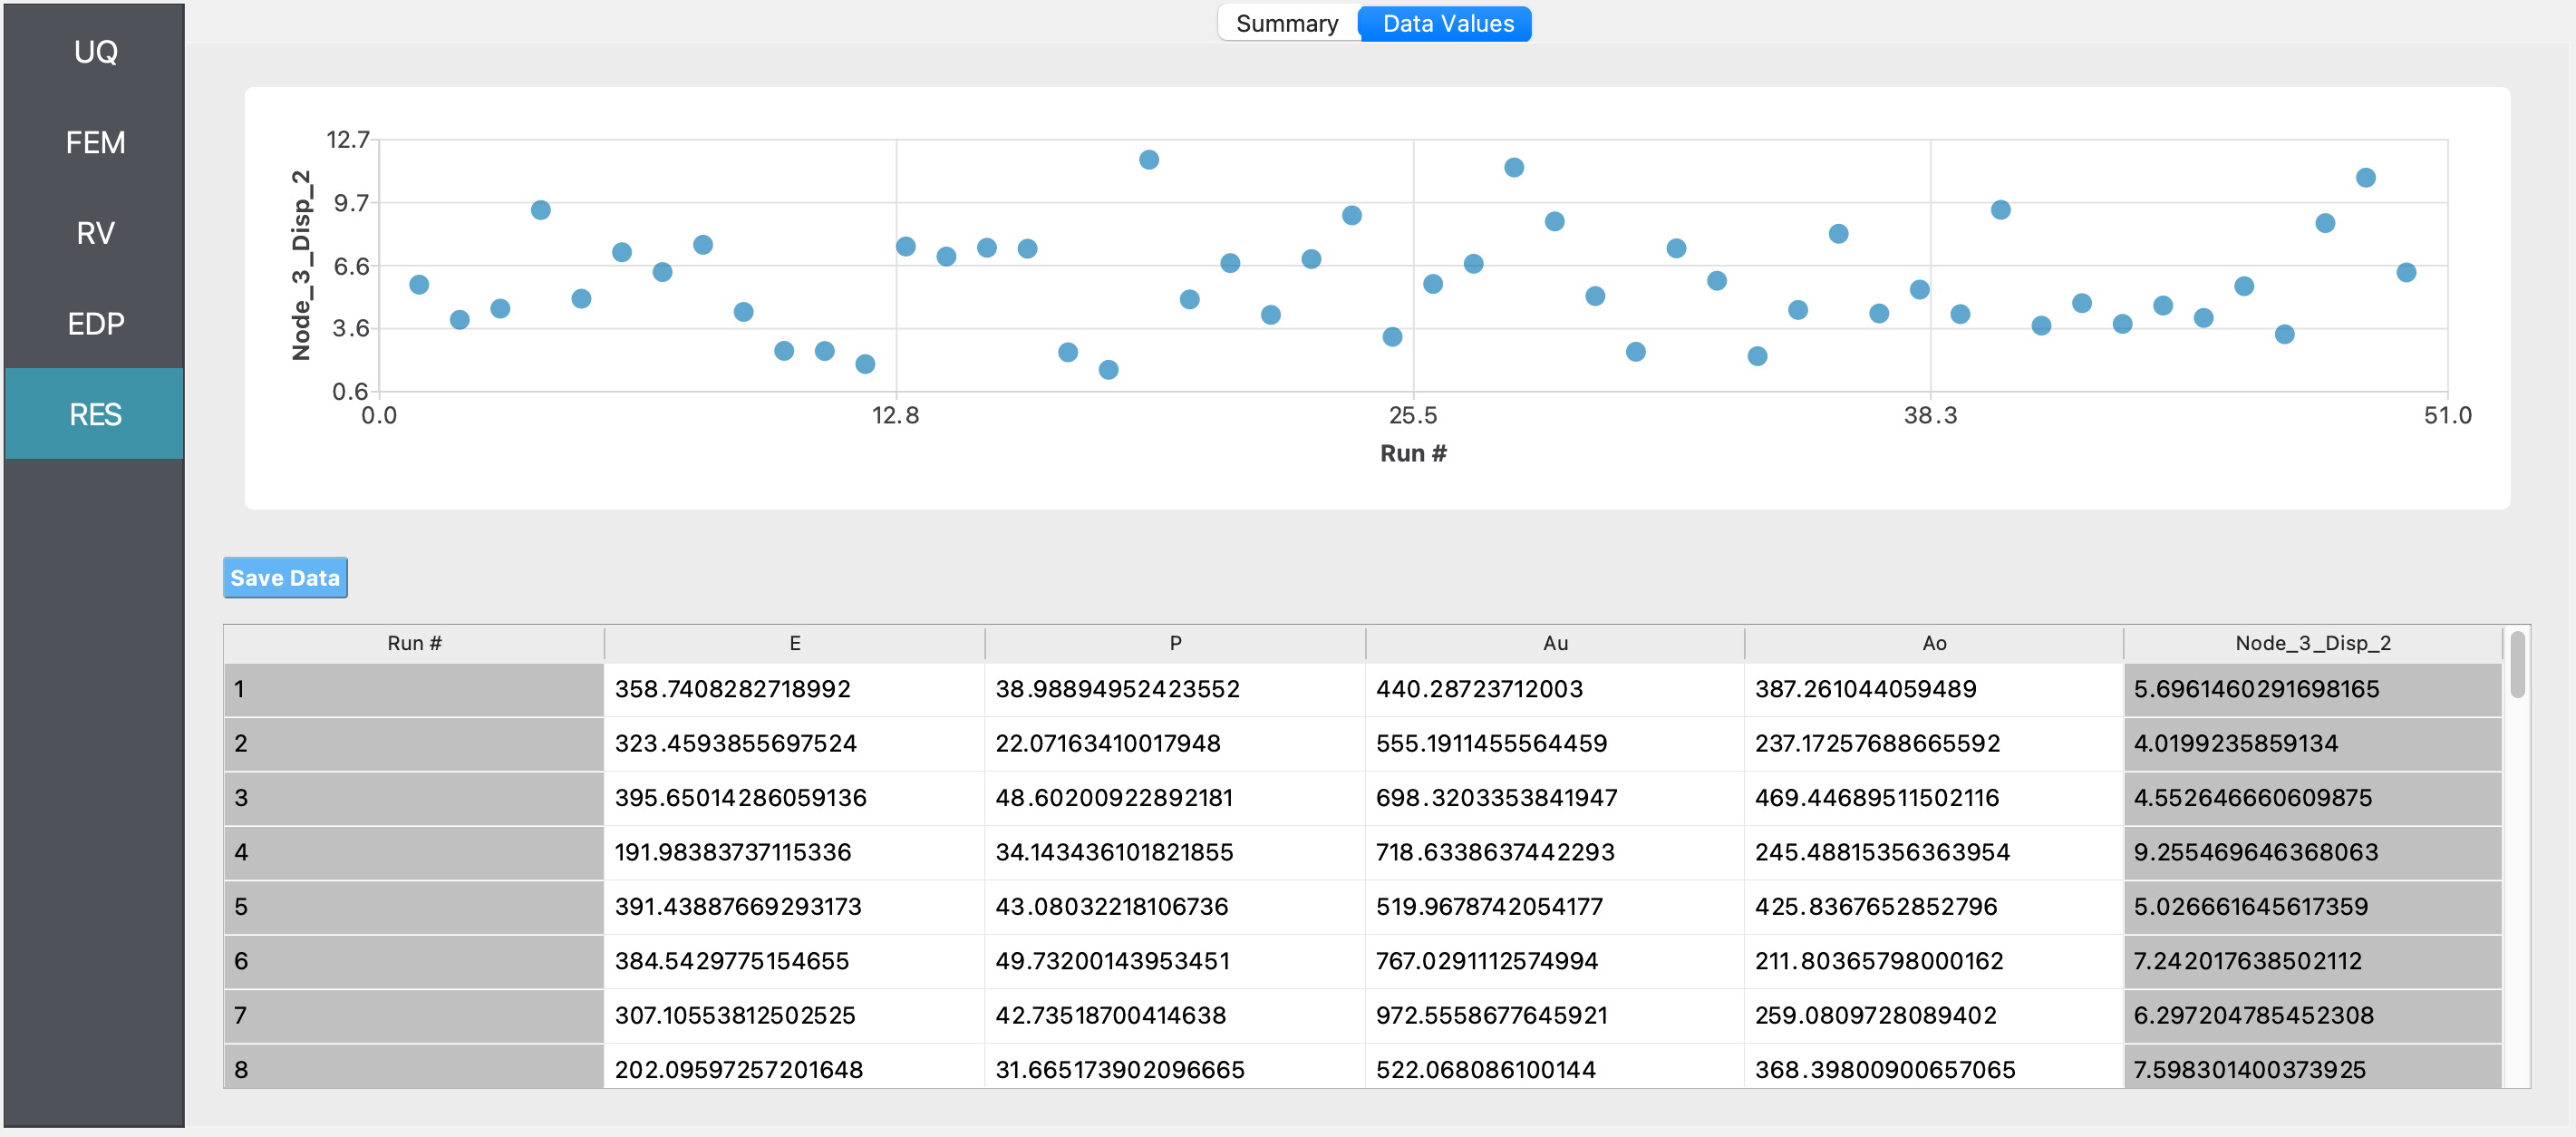
When done the RES panel will be selected and the results will be displayed. The results show the values the mean and standard deviation.
Summary:
Mean = 5.77619
Std = 2.4664
Skewness = 0.456808
Kurtosis = 2.7146
Data Table:
